If all of your childhood pictures are slides, guess what….. That’s great news! Here is why.
Color print pictures from back in the 60’s and 70’s have faded. That’s if it was even a great color print to begin with. It’s all together possible that that mail in photo lab may not have done the greatest printing job in the first place. And where are those old negatives? Chances are those went in the trash years ago. So you’re stuck working with that discolored print.
Slides, however, are standing up to the test of time with a little more punch.
So good news! You have slides. But now what?!
It’s actually super easy to turn slides into a digital file.

First you’ll need a slide scanner. I’ve tried a few and this is the scanner I suggest. It’s easy to use and gets a great quality digital scan.

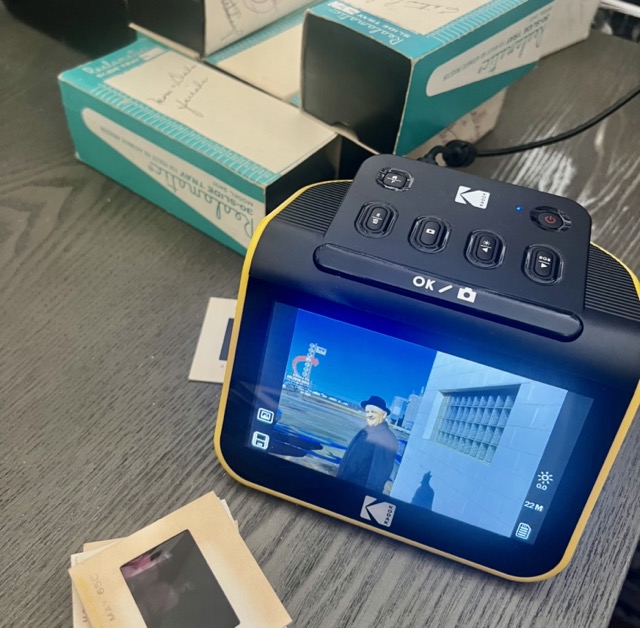
It plugs into a USB port for power. You can use it by simply plugging it into any USB box for a phone charger. The nice part of that is that you don’t even need a computer to use it. That makes this an easy project you can do almost anywhere!
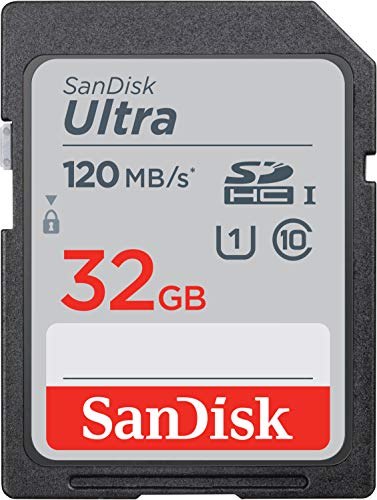
It does save all of the images to a memory card though. This Kodak scanner needs to have 32gb memory card or smaller. If you don’t have one handy this one will do the trick:
Here is a YouTube video I created with step by step instructions on how to use it.
Before you start:
- try to get all of your slides into chronological order before you start scanning
The instructions for using the scanner are pretty simple. It comes with several different film/slide holders for scanning different kinds of films. Select the one that is for slides and then insert it into the scanner. You’ll then be able to feed the next slides through. Each new slide will push the past one out the opposite side. This makes it a quick and easy process.
Scanning Tip:
- If you have slides that represent different events or years and you want to keep those separated out, I suggest taking a scan of nothing or an empty screen between events. Then when you load those pictures on to your computer it’ll be easy to find the division between those two events.
Then when it’s time to view those pictures on your computer you can pop that memory card into the memory card slot on your computer or if your computer doesn’t have a place to plug that in, a memory card reader will be needed. Here is the one that I use:

Once you have all of those slides digitized there are endless things you can then do! Here are some past posts that I’ve done that may be great next steps!
Feeling motivated to pull those dusty slides out of the closet now!? I hope so. Those old pictures need to be enjoyed. It’s also best that they have a safe back up copy. Get going on that project ASAP and keep following along on Instagram and Facebook and I’ll keep sharing my best tips to get you photo organized 🙂